CLICK HERE FOR FREE BLOGGER TEMPLATES, LINK BUTTONS AND MORE! »

Wednesday, November 2, 2011

Choices, Choices, Choices!

Hello Stamping Friends! I need to start out with two apologies- first of all, I am SO sorry that I haven't been posting regularly. Life has been crazy busy lately. I was supposed to attend my first craft fair last Saturday and spent two weeks preparing for it and then- IT SNOWED! I didn't get to go the fair after all and was very disappointed, but I do have lots of cool things to use as gifts. I will get some pictures taken and show them to you very soon! The second apology is for the photography on this blog post. I promised to post my pictures for my next and final Christmas card buffet today and I didn't get finished with the last card until it was already dark. Nighttime card photography is definitely not the best, but hopefully you will be able to tell enough about the cards to make your choices.


Here is the mini muffin tin advent calendar. I was really pleased with how it turned out. I really like the Letters for Santa DSP for this project. Each numbered cover has magnets on the back, so it can be hung and the covers won't move. Because this is made with a muffin tin, you can give a little treat on each day as you count down to Christmas. The first picture shows the entire project and the next two are close ups to show a little more detail. I hope you like it!


Supplies Used:
Stamps: 25 & Counting
Paper: Letters to Santa DSP, Old Olive CS, Riding Hood Red CS, Marina Mist CS, Early Espresso CS, Whisper White CS
Ink: Early Espresso, Riding Hood Red, Old Olive, Marina Mist, Blushing Bride, Staz On
Accessories: mini muffin tin, scalloped square punch, 1" square punch, Cherry Cobbler 1 1/4" striped grosgrain ribbon

On to the card choices for the buffet! When ordering your cards, please call them by the name posted directly above each card. This will ensure that I prepare the correct supplies for you. Thanks!

Welcome Christmas


Supplies Used:
Stamps: Welcome Christmas, Netting (background), Pines and Poinsettas, Petite Pairs
Paper: Crumb Cake, Cherry Cobbler, Early Espresso, Very Vanilla
Ink: Early Espresso, Crumb Cake
Accessories: Big Shot, Vintage Wallpaper EF, 1 3/8" circle punch, 1 1/4" circle punch, Itty Bitty Shapes punch pack, Cherry Cobbler quilted satin ribbon, basic pearls, stampin' sponge
CASE of this card made by Jen Sannes


Wreath


Supplies Used:
Stamps: Perfect Punches
Paper: Very Vanilla, Old Olive, Brushed Gold
Ink: Cherry Cobbler, Sahara Sand
Accessories: Big Shot, Petal-a-Plenty EF, 2 3/8" scalloped circle punch, 1 3/4" scalloped circle punch, 1 1/4" circle punch, dimensionals, sponge
CASE of this card by Dawn Olchefske


Snowman


Supplies Used:
Stamps: Snow Much Fun, Christmas Greetings
Paper: Pool Party, Blushing Bride, Basic Black, Whisper White
Ink: Staz On, Basic Gray marker, Pool Party marker, Blushing Bride marker, Peach Parfait marker
Accessories: Big Shot, Perfect Polka Dots EF, Dotted Scallop Ribbon Border punch, Snowflake punch, 1 1/4" circle punch, 1" circle punch, basic rhinestone, shimmer spray (lots of it!)
CASE of this card made by LeeAnn Greff
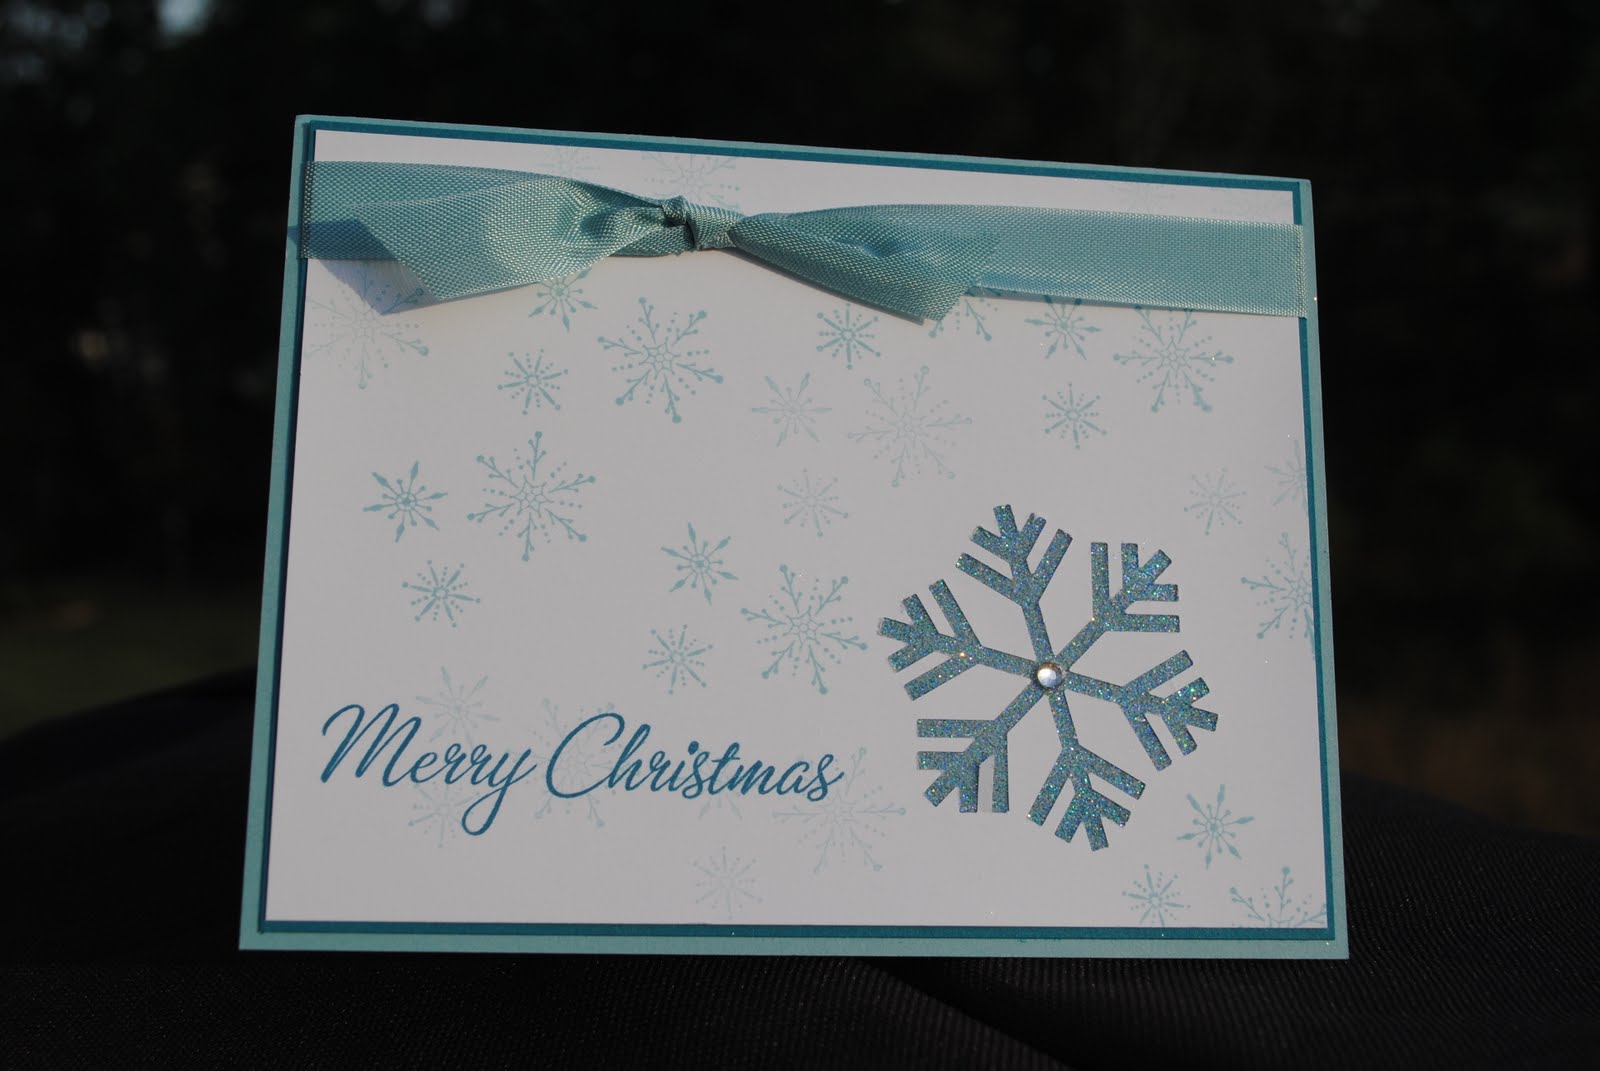
Christmas Tree


Supplies Used:
Stamps: Bright Hope, Teeny Tiny Wishes
Paper: Rich Razzleberry, Island Indigo, Baja Breeze, Whisper White
Ink: Rich Razzleberry, Island Indigo, Baja Breeze
Accessories: Silver Glimmer paper, Baja Breeze seam binding, Scallop Oval punch, Large Oval punch, shimmer spray (sprayed heavily!)
A Marla Reed Original! :)


OK, I hope that you like the cards and calendar. I tried to provide a mixture of traditional and non-traditional along with a couple of different styles. If you are coming to the class on November 19th, please email me (reedmarla@comcast.net) with you preorder no later than 9:00 p.m. this Sunday, November 6th. Thanks and I hope to see you there!

~Marla


Pin It

Wednesday, October 5, 2011

Choices for Christmas Card Buffet #2

Hello there! My second Christmas Card Buffet is coming up on October 22nd. Below are the choices. If you plan to attend, please email me at reedmarla@comcast.net to let me know which designs you would like to make as well as how many of each design. Please call the cards by the name posted above them. Thanks!


The Sounding Joy...
Supplies Used:
Stamps: The Sounding Joy
Paper: Wisteria Wonder, Elegant Eggplant, Crumb Cake, Whisper White
Ink: Wisteria Wonder, Elegant Eggplant
Accessories: Big Shot, Snow Burst EF, Crumb Cake seam binding
Case of this card made by Marie Shaughnessy

Snow Much Fun...
Supplies Used:
Stamps: Snow Much Fun
Paper: Baja Breeze, Island Indigo, Whisper White
Ink: Stazon, Baja Breeze, Island Indigo, Pumpkin Pie
Accessories: Big Shot, Northern Flurry EF, 2 Way Glue Pen, Dazzling Diamonds, Blender Pens, Baja Breeze seam binding
CASE of this card made by my friend, Rita Wright

Christmas Tree...
Supplies Used:
Stamps: Pennant Parade, Teeny Tiny Wishes
Paper: Cherry Cobbler, Crumb Cake, Very Vanilla
Ink: Cherry Cobbler, Crumb Cake, Lucky Limeade, More Mustard
Accessories: Big Shot, Petals-a-Plenty EF, brayer, 2 1/2" circle punch, 2 3/8" scalloped circle punch, Modern Label punch, Word Window punch, Cherry Cobbler quilted satin ribbon

Holly, Jolly Christmas...
Supplies Used:
Stamps: Festive & Fun
Paper: Riding Hood Red, Chocolate Chip, Pool Party, Whisper White
Ink: Stazon, Riding Hood Red, Pool Party, Chocolate Chip, Old Olive
Accessories: Big Shot, Perfect Polka Dots EF, Stripes EF, Chocolate Chip scallop dots ribbon, Scallop Trim border punch, dimensionals, glue dots
CASE of this card made by Chris Smith

I hope you liked these cards! If you are local, please plan to attend this fun class and leave with a whole stack of Christmas cards to give to your friends and family!

Have a wonderful day!

~Marla Pin It

Tuesday, October 4, 2011

Cookie Stamps for a Good Cause!

Hi there, stamping friends! Stampin' Up! has a brand new product available- Sweet Pressed Cookie Stamps! These stamps are not for paper and ink, but for cookie dough. All you do, is prepare your cookie recipe (there are two included with the stamps) and stamp the shape you want into the dough. These are great fun for kids and would make an excellent gift!

To make them even sweeter, I have decided to donate all of my commission on the sale of these stamps to two awesome organizations that assist families battling childhood cancer. A friend of mine has a little girl named Jessica who was diagnosed with Acute Lymphoblastic Leukemia when she was five years old. I am happy to report that Jessica is now seven years old and just completed her final chemo treatment. Her mom founded an organization called Jessica Rocks which supports another organization called Timmy's Fund. Timmy Quigley was diagnosed with a very aggressive brain tumor at the age of two and unfortunately did not survive. His parents founded Timmy's Fund to assist other families who were battling childhood cancer. They assist with transportation, food, and lodging expenses for all families who have children being treated for cancer at West Virginia University's Children's Hospital. The best part is that 100% of the donations collected goes directly to the families.

Any time anyone purchases this product from me, $3.39 will be donated to Jessica Rocks/Timmy's Fund. You can help by making a purchase or by collecting orders from your family and friends. If you are able to sell ten sets of the Sweet Pressed Cookie Stamps, it could be entered as your own workshop order and you would raise $33.90 for these awesome charities and you would also earn $25 in free Stampin' Up merchandise.

Please click on the links above and read more about these incredible charities. Send me an email at reedmarla@comcast.net if you would like to place an order, collect your own orders, or you would like additional information.

Thank you!
~Marla
Pin It

Friday, September 23, 2011

Spice Cake Lollies

Hello again, stamping friends! I have a non-card project to share with you today. When I went to Convention, there were lots of incredible demonstrations where they made adorable boxes, home decor items, and gifts. I was very inspired to branch out a bit with my crafting and try to make some things other than cards.

I just loved this little project. I saw something similar on Heather Summers' blog and decided to try it for myself. I used the new Simply Scored tool to make these little lollies. They are easier to make than I thought that they would be. I finished off the project with a small terra cotta pot, a styrofoam ball inside the pot to hold the sticks in place, lollipop sticks, Spanish moss and a hot glue gun.

We made these at my first team meeting and I am going to give one to the hostess of my workshop that is later this evening. She is a good friend, club member, and loyal customer, so I wanted to do something extra special for her.


Stampin' Up Supplies Used:
Paper: Spice Cake DSP, Soft Suede CS, Pool Party CS, More Mustard CS, Very Vanilla CS
Accessories: Simply Scored, scalloped circle punch, 1 1/4" circle punch, Blossoms Triple Layer punch, 1" circle punch, antique brads, in color brads, sticky strip

I hope that you like this project and that my hostess likes it too! Have a fantastic weekend! Thanks for stopping by! Check back next week for more projects!

~Marla Pin It

Wednesday, September 21, 2011

The Sounding Joy

Hello again!

Two postings in two days! Don't any of you go into shock! I'm trying to do better about stamping at least two or three days a week and stamping for fun more often (instead of just when I'm prepping for an event). I am loving all of the challenge sites out there. They are really great. I made this card for two different challenges- Freshly Made Sketches and Hand Stamped Sentiments. I haven't played along with Hand Stamped Sentiments before, but when I saw that this weeks challenge was to use embossing, I had to do it. I love embossing of all types. Nothing gives a card that WOW effect like embossing. I used two types of embossing on this card- dry embossing and heat embossing. I tried something that I had never done before on this card. I sponged the edges of the image panel using Versa Mark ink and then sprinkled silver embossing powder over the sponged ink and heat set it. I really like the effect that it gave. I don't think that I have ever seen this done before, but decided to try it because sponging with classic ink just didn't do it for this card.

I used a brand new stamp set, The Sounding Joy, on this card. It is in the holiday mini catalog and it arrived on my doorstep just about two hours ago. This has to be a new record for how quickly I made a card with a new stamp set! I also used another holiday mini item- the Snow Burst embossing folder. I love the super deep impressions that it makes!


Stampin' Up Supplies Used:
Stamps: The Sounding Joy
Paper: Not Quite Navy, Brushed Silver, Baja Breeze, Whisper White
Ink: Not Quite Navy (for sponging the edges of the stars), Baja Breeze, Versa Mark
Accessories: Big Shot, Show Burst embossing folder, heat tool, silver embossing powder, sponge
Techniques: Heat Embossing, Dry Embossing, sponging

I hope that you liked this card! If you need some inspiration, check out the challenge sites that I linked above. Have a great day!

~Marla

Pin It

Tuesday, September 20, 2011

Halloween Treats

Hello again! Can you believe how quickly time is flying???? My son has already been in first grade for almost a month! Fall is upon us and Halloween is just a few short weeks away! I have been busy planning for my next class on October 7th. It is a class to make Halloween treat holders and I'm really excited about it. It is the first class that I have ever done that is not a card making class- can you believe it? I think we will have a lot of fun and I really like all of the cute ideas I found when looking for projects to make. It had a hard time deciding, but I finally narrowed it down to these three choices-


Aren't they the CUTEST?

This class is being done buffet style. Everyone who is attending can make as many or as few of each treat holder as they like. They just need to preorder the treats that they wish to make by this Friday, September 23rd. Each treat holder is individually priced, but everyone attending can get them for half-price by placing a $20 order on the day of the class. Here are some close-ups and more information on each project.

The owl:


Stampin' Up Supplies Used:
Paper: Soft Suede, Pumpkin Pie, Cajun Craze, Whisper White, Basic Black
Ink: Cajun Craze
Accessories: Big Shot, Pillow Box die, Fancy Fan Letterpress Plate, Hearts Trio punch, 3/4" circle punch, 1 1/4" circle punch, Blossom Petals punch, basic rhinestones, glue dots, sticky strip

I originally saw this little guy on Pinterest and there was a link to a great little tutorial that you can find here. My friend, Rita Wright, also made her own version that you can see on her blog. I love the matching card that she made in addition to the little owl. These treat holders will hold several small pieces of candy or a small bag of M&M's and cost $1 each (or $.50 if a $20 order is placed at the class). If you are preordering this treat holder, please tell me how many you would like to make of "the owl".


The bat:

Stampin' Up Supplies Used:
Paper: Basic Black, Whisper White
Ink: White Gel Pen
Accessories: Big Shot, Petal Cone die, Spider Web embossing folder, circle punch, shimmer spray

I saw this adorable bat on Shelli Gardener's blog. She is the CEO of Stampin' Up and demonstrated making one at a regional event. He is pretty large (about 4 1/2" tall) and will hold lots of candy. Each of these will cost $1 (of $.50 if a $20 order is placed the day of the class). If you would like to preorder this one, please tell me how many you would like to make of "the bat".


The bag topper:

Stampin' Up Supplies Used:
Stamps: Spooky Bingo Bits
Paper: Old Olive, Basic Black, Rich Razzleberry, Pumpkin Pie, Whisper White
Ink: Old Olive, Rich Razzleberry, Basic Black, Pumpkin Pie
Accessories: 1x8 cello bags (not pictured), scalloped square punch, 1" square punch

These bag toppers will be perfect for making treats for an entire classroom of children. They will be used with the 1"x8" cello bags and will hold pencils, pixie sticks, smarties, etc. I will have the entire stamp set called "Spooky Bingo Bits" so that you can choose the stamped image that you would like to use. These treats will cost $.50 each (or $.25 if a $20 order is placed the day of the class). If you would like to preorder this treat, please tell me how many you would like to make of "the bag topper".

I hope you liked these projects! If you are planning to attend this class, please be sure to preorder no later than this Friday, September 23rd! Thanks for stopping by!

~Marla

Pin It

Wednesday, September 14, 2011

Another Challenge Card!

Hello again, stamping friends! Why didn't anyone ever tell me how much fun I would have participating in challenges? They are a blast! As it turns out, I do enjoy designing my own cards! Who would have guessed? I participated in the sketch challenge over at Freshly Made Sketches once again this week. I really like the sketches they have chosen. Go on over and check them out! Here is this week's sketch if you'd like to play along!


Here is my take on their sketch:


Supplies Used:
Stamps: Raining Flowers, Petite Pairs, Netting (background)
Paper: More Mustard, Soft Suede, Early Espresso, Very Vanilla, Spice Cake DSP
Ink: Pear Pizzazz, Crumb Cake, More Mustard, Cajun Craze, Early Espresso
Accessories: Simply Scored, Early Espresso satin ribbon (retired), Scalloped Oval punch, Large Oval punch, sponges
Techniques: grid technique, sponging, gathered ribbon

I decided to make a standard 4 1/4"x 5 1/2" card rather than the square because I don't keep a lot of 12x12 paper on hand. There are a few elements of this card that I tried for the first time. The first is the technique that I used on the stamped image. It is called the grid technique and you can find an awesome tutorial here on splitcoast. My card ended up being a CASE of the card shown in the tutorial although I didn't really intend for it to be. I had seen the tutorial a while back and thought "That would be a good way to use the Raining Flowers stamp set." I guess that idea stuck in my mind when I sat down to make this card because my finished product looks very similar to the example. Oh well! The second new element I tried is the gathered ribbon. It was very simple to do. I placed a piece of sticky strip on the front of my card where I wanted the gathers. I attached a short length of ribbon and then doubled a little bit over what was already attached and then attached a little bit more until I had the look that I wanted.

Overall I am pretty happy with this card and I'm thinking that I may try a few more cards using the grid technique. It is a quick and easy way to give the stamped image a little extra visual interest!

Thanks for stopping by!

~Marla Pin It

Friday, September 9, 2011

Two Challenges in One Card!

Hello! Wow! It has been quite a while since my last post! So sorry about that! I hope to have more time to stamp and post now that we have settled back into our school routine!
I have decided to try playing along with some of the many challenges that are posted online each week. As you know, I CASE a lot of the cards that I make. While that isn't a bad thing, I think that it is time for me start doing more of my own designing. I want to spread my creative wings and challenge myself a bit.
There is a brand new stamping challenge blog called Freshly Made Sketches and I decided to try their very first sketch. This card is also for the challenge on the SUO Challenges blog. You should check out these challenges and play along. This card uses so many different products that I love- Spice Cake DSP, the stamp sets "Gently Falling" and "Petite Pairs". As soon as I saw the sketch challenge, I knew what I was going to use. OK, enough talk- here is the card!
Do you see the little embellishment in the lower left corner? It was made by punching a 1" circle of Very Vanilla cardstock, covering it with sticky strip, and then taking the Crochet Trim and gathering it and attaching it to the edges of the circle. I added an antique brad to the center and viola- a quick, easy peasy, and pretty little embellishment!
Supplies Used:
Stamps: Gently Falling, Petite Pairs
Paper: Pool Party CS, Soft Suede CS, Very Vanilla CS, Spice Cake DSP
Ink: More Mustard, Soft Suede
Accessories: Crocet Trim, 1" circle punch, sticky strip, antique brad
Techniques: stamping off
I was really pleased with how this card turned out and I hope you like it too! I had a lot of fun making it and will definitely continue to play along with the challenges. Thanks for stopping by! Come back soon!
~Marla
Pin It

Wednesday, August 24, 2011

Card Buffet #1

Good morning! I have been a stamping fool over the past couple of days. I wanted to get the samples made for my first Christmas card buffet and I'm also working on prepping my cards for my Birthday Bash card class that is coming up this Saturday (check back later in the week for a peek at those cards). We are also having a busy week because my sweet boy started first grade this week! He has been doing great! He likes his teacher and is making new friends. I couldn't ask for more!
OK, you came to see the cards, so here they are! I tried to choose cards that are fairly flat so that they can be mailed easily and won't charge extra postage. I hope that you like all of them. If you plan to come to the card buffet, please email me (reedmarla@comcast.net) with the cards that you would like to make and how many of each you would like to make by this Saturday, August 27th.
Card #1
Supplies Used:
Stamps: Stitched Stockings, Woodgrain
Paper: Crumb Cake, Basic Black, Cherry Cobbler, Soft Suede, Daffodil Delight
Ink: Early Espresso, Not Quite Navy, Real Red, Garden Green, More Mustard
Accessories: Stocking punch, Blossom Petals punch, Big Shot, Square Lattice embossing folder, silver mini brads, mat pack, paper piercer, sponge
Techniques: sponging
CASE of a card made by the amazing Jackie Topa
Card #2
Supplies:
Stamps: Welcome Christmas
Paper: Cherry Cobbler, Whisper White, Wild Wasabi
Ink: Cherry Cobbler, Wild Wasabi
Accessories: Big Shot, Vintage Wallpaper embossing folder, basic pearls
CASE of a card made by Shauna O'Donnell
Card #3
Supplies Used:
Stamps: Four the Holidays, Serene Snowflakes
Paper: Baja Breeze, Island Indigo, Whisper White
Ink: Baja Breeze, Island Indigo
Accessories: Snowflake punch, Baja Breeze seam binding, Champagne Mist shimmer paint (used in shimmer spray), Dazzling Diamonds, basic pearls
Techniques: Glitter Window
CASE of a card made by Ilina Crouse

Card #4
Supplies Used:
Stamps: Come to Bethlehem
Paper: Brushed Gold, Very Vanilla
Ink: Crumb Cake, Early Espresso
Accessories: small star punch (retired), dimensionals
CASE of a card I saw on splitcoast
Hope you like the cards! Please let me know soon which cards you would like to make and how many of each design. I can't wait to hear from you!
Pin It

Friday, August 19, 2011

Doilies!

Hello again, everybody! I'm sorry that it's been a little while since I last posted. August has been a very busy month in our world. I was out of town for a week visiting family and we have celebrated birthdays for both of our kids. My hubby's birthday is still to come and school begins for our son (who will be a first grader!!) on Monday, so the busy-ness will continue for a bit longer, but things should soon calm down and I can focus less on my busy-ness and more on my business!
I need to preface this card by saying that I absolutely, positively WAS NOT going to purchase the doilies. They WERE NOT my style and I DID NOT like them. Then my fellow demonstrator, Lyssa Zwolanek (who is AWESOME!) started a blog series all about the doilies. She is posting a different project using the doilies everyday for the entire month of August. You can check out all of her lovely creations here. It didn't take too many of her posts before my mind began to change. I don't always see a set's full potential until someone else points it out and that was definitely the case here. I broke down and ordered the Delicate Doilies and Hello, Doily sets and I have to admit that it is really easy to make beautiful, versatile cards with these sets. Here are my first two attempts using these sets. I hope that you like them!

I can't decide which card I prefer. Which is your favorite? Do you like the side ribbon or the top ribbon? Do you like the antique brad or the in-color printed brad? I think that some version of this card will be included in my birthday bash card class next Saturday. Today is the last day to register for the class. If you would like to come, please let me know soon!
For the large doily, I inked it in Wisteria Wonder ink and then used the Concord Crush marker on the edges to give the same effect that the rock & roll technique would give. For the smaller doilies, I stamped a few of them fully inked and a few of them were stamped off once before being stamped onto the card. I also did some light sponging over the card with Wistera Wonder and sponged the edges with Concord Crush. The sentiment, which is stamped in Concord Crush, is from another new set called Perfectly Penned. This is another set that didn't jump right out at me when I originally saw it, but has definitely grown on me. I love the font and the sentiments (Thank You, Happy Birthday, Get Well, Celebrate Today).
Supplies Used:
Stamp Sets: Delicate Doilies, Hello Doily, Perfectly Penned
Paper: Wisteria Wonder CS, Concord Crush CS, Whisper White CS
Ink: Wisteria Wonder ink pad, Concord Crush ink pad, Concord Crush marker
Accessories: Wisteria Wonder 3/8" ruffled ribbon, In Color Printed Brads, Antique Brads, Stampin' Sponge
Techniques: Stamping Off, Sponging
Thanks for stopping by! I will be posting the cards for my birthday class soon, so be sure to check back for those! See you soon!
~Marla
Pin It

Sunday, July 31, 2011

I love teaching techniques!

Hi Stampers! I hope that everyone has had a wonderful weekend. Mine started with a fun night of stamping with a great group of ladies who make up my hostess club. I am blessed to have such a sweet group to stamp with. I really enjoy them! We focus on two different techniques at each meeting and make two projects using the new techniques. It wasn't intentional, but we used A LOT of glitter this time!
Here is our first card. It uses a technique called "Glitter Window". This technique is nice if you want lots of sparkle on a certain area of your card and you want it to stay on the card and not get all over everything! To do this technique, you punch a hole in your cardstock and then place a piece of clear packing tape on the back of the card so that the sticky side completely covers the punched hole. Then sprinkle glitter over it and you're done! The "bride" heart is done using this technique. This card is an anniversary card, but it would work just as well for a wedding. I have seen this card done many times and I'm not sure who had the original idea, but it wasn't me. Hehe!
Supplies Used:
Stamps: Teeny Tiny Wishes
Paper: Basic Black, Basic Gray, Wisteria Wonder, Whisper White
Ink: Basic Black marker, Wisteria Wonder
Accessories: Big Shot, Elegant Lines embossing folder, Large Heart punch, Modern Label punch, Word Window punch, Dazzling Diamonds glitter, Whisper White 3/8" taffeta ribbon, Champagne Mist shimmer paint (in homemade shimmer spray)
Technique: Glitter Window
This is the second card that we made. I really liked how it turned out. It is a nice girly card. It is a little bit hard to see in the picture, but I used the Fancy Fan letterpress plate to make the background. This is the first letterpress plate that I have purchased and I was a little unsure of them at first, but I really like the subtle color contrast and texture that it gives. The technique on this card is the paper piecing technique. I used it to color in the cupcake. To do this technique, you stamp the entire image first and then you stamp pieces of it on colored cardstock or DSP and cut it out and adhere it over the original stamped image. For the cupcake, the frosting is a piece of Blushing Bride DSP, the cupcake liner is Melon Mambo cardstock, and the cake stand is Brushed Silver cardstock. The string of pearls gives it an extra special feel.
Supplies Used:
Stamps: Delightful Dozen, Easy Events (can't stop using it!)
Paper: Melon Mambo, Bluching Bride, Whisper White, Brushed Silver, Blushing Bride DSP (from retired hostess pack)
Ink: Stazon, Melon Mambo, Blushing Bride, Whisper White (Craft)
Accessories: Big Shot, Fancy Fan Letterpress Plate, 1 3/8" Circle punch, 1 3/4" Scalloped Circle punch, 2-way glue pen, Melon Mambo Scalloped Dots ribbon, stampin' sponge
Techniques: Paper Piecing, Sponging
CASE of this card
Thanks for stopping by! I am really making an effort to post more regularly, so be sure to check back soon to see what I've been working on!
~Marla
Pin It

Tuesday, July 26, 2011

Easy Events Cards

Hello! I have been using the new set called "Easy Events" like crazy lately. It was one of the sets that I received for free for attending convention and I really like it. There were display boards set up at convention with tons of samples using the sets that we received in our convention bags. This is a great, versatile set! You can use it to make wedding, baby, birthday, Christmas, thinking of you, thank you, and hello cards. Here are a few examples of cards that I have made using this set.

A cute baby card...
Supplies Used:
Stamps: Easy Events
Paper: Pool Party, Lucky Limeade, Whisper White, Peach Parfait DSP (from retired hostess paper)
Ink: Tempting Turqoise, Daffodil Delight, Pumpkin Pie, Black Staz On, Peach Parfait, Lucky Limeade
Accessories: Dotted Scallop Ribbon Border punch, White Baker's Twine, Stamp-a-ma-jig, Aqua Painter
Techniques: Watercoloring
CASE of this card by Tessa Wise

A little thinking of you notecard...

Supplies Used:
Stamps: Easy Events
Paper: Pear Pizzazz, So Saffron, Chocolate Chip, Whisper White, Regal Rose, Watercolor paper, Pocketful of Posies DSP
Ink: Pear Pizzazz, Early Espresso, Regal Rose markers
Accessories: Chocolate Chip Scalloped Dot ribbon, Owl punch (for the hearts), Modern Label punch, Word Window punch, glue dots
Technique: Watercoloring
My take on this card made by Mary Fish


A wedding card made in new In Colors...
Supplies Used:
Stamps: Easy Events
Paper: Lucky Limeade, Whisper White, Wisteria Wonder
Ink: Lucky Limeade, Wisteria Wonder, Rose Red
Accesories: Big Shot, Elegant Bouquet embossing folder, Decorative Label punch, White Taffeta ribbon, blender pen, basic rhinestones, dimensionals
Technique: Watercoloring with blender pens
This is a CASE of a display board card

Thanks for stopping by! Have a great day!

~Marla Pin It

Wednesday, July 20, 2011

Hi, my name is Marla and I'm a swap-a-holic!

Hello! Is anybody out there still checking my blog? I have been terrible about blogging lately. I really thought that once summer came, life would slow down and I'd have more time to stamp and blog and well, that just hasn't happened! I'm no longer used to having two kids here full time and my kiddos have kept me hopping! As some of you know, I just returned home from Salt Lake City where I attended my first ever Stampin' Up Convention. It was an awesome trip and something that every demonstrator should experience at least once! These are all of the cards that I made to swap with other demos at convention. I got some wonderful cards in return and I hope to share some of them with you very soon!


I made the card above for an organized technique swap. Does it look familiar? I have made this card over and over again because I love it so much. I just change a little something about it each time. This card uses two of the brand new in colors- Wisteria Wonder and Lucky Limeade. I absolutely love Wisteria Wonder, which shouldn't surprise you too much if you know me. I am a total purple freak!!!

Supplies Used:
Stamps: Vintage Vogue, Precious Butterflies (new hostess set)
Paper: Wisteria Wonder, Lucky Limeade, Very Vanilla
Ink: Lucky Limeade, Wisteria Wonder, Sahara Sand, Versamark
Accessories: clear embossing powder, heat tool, large oval punch, scalloped oval punch, Wisteria Wonder ruffled ribbon
Techniques: emboss resist, sponging


I made this card for the same technique swap. It is loaded down with techniques- wax paper resist, faux suede, and fork bow. I also sprayed it with homemade shimmer spray to give it a little sparkle. I love these colors together!

Supplies Used:
Stamps: Precious Butterflies (new hostess set)
Paper: Basic Gray, Perfect Plum, Wisteria Wonder, Glossy Cardstock
Ink: Basic Gray, Wisteria Wonder
Accessories: Big Shot, Vintage Wallpaper embossing folder, Fun Flowers die, 3/8" Taffeta ribbon, antique brad, large oval punch, scalloped oval punch, champagne mist shimmer paint
Techniques: wax paper resist, faux suede, fork bow, sponging


I made this cute (if I do say so myself) card for a swap that was organized by Lyssa Zwolanek, who is an awesome demonstrator. I received the BEST cards from this swap and can't wait to participate in it again! It took some time to make fifteen of these cards, but I was really happy with how they turned out and LOVED the cards I got in return, so it was totally worth it! This card uses colors from the subtles collection, but I used the least subtle colors in the collection for this fun color combo.

Supplies Used:
Stamps: Bring on the Cake, Create a Cupcake
Paper: Perfect Plum, Marina Mist, Rose Red, Wild Wasabi, Whisper White
Ink: Rose Red, Perfect Plum, Marina Mist, Wild Wasabi markers
Accessories: Big Shot, Square Lattice embossing folder, Extra-Large Oval punch, Scallop Edge border punch, whisper white 3/8" taffeta ribbon


This card was one of my general swaps. I used the new set called, "Pennant Parade" as well as the new scalloped dots ribbon. I think that this card will definitely be one made at my Christmas card classes. I made the background by embossing the Crumb Cake cardstock using the Petals-a-Plenty embossing folder and then brayering Cherry Cobbler ink over the raised flowers.

Supplies Used:
Stamps: Pennant Parade, Teeny Tiny Wishes
Paper: Chocolate Chip, Cherry Cobbler, Crumb Cake, Very Vanilla
Ink: More Mustard, Lucky Limeade (pad and marker), Cherry Cobbler (pad and marker), Early Espresso (marker)
Accessories: Big Shot, Petals-a-Plenty embossing folder, Modern Label punch, Word Window punch, 2 3/8" Scallop Circle punch, 2 1/2" Circle punch, Chocolate Chip 1/2" Scalloped Dots ribbon, brayer
Techniques: dry embossing, brayering, marker to stamp


I used the same brayering technique on the background of this general swap card. I embossed Melon Mambo cardstock in the brand new houndstooth embossing folder and then brayered Basic Black ink over the raised parts. This card also uses the new hostess set called "Happiest Birthday Wishes", which I love. I make tons of birthday cards, so I am a sucker for a birthday set! The sentiment has several punched out layers that are popped up with dimensionals. It gives a fun effect!

Supplies Used:
Stamps: Happiest Birthday Wishes
Paper: Basic Black, Melon Mambo, Whisper White
Ink: Basic Black, Melon Mambo
Accessories: Big Shot, Houndstooth embossing folder, Fun Flowers die, 1 3/4" Scallop circle punch, 1 3/8" circle punch, 1 1/4" circle punch, Melon Mambo Scalloped Dots 1/2" ribbon, brayer
Techniques: dry embossing, brayering


This last card is a pretty simple one that I CASED from the Spanish edition of our catalog. I love this set (especially the little bench with the squirrels) and I haven't used it much, so when I saw this card in the Spanish catalog, I had to make my own version. This card combines two of my favorite things- squirrels and purple!

Supplies Used:
Stamps: Pendant Park
Paper: Elegant Eggplant, Wisteria Wonder, Lucky Limeade
Ink: Lucky Limeade, Elegant Eggplant, Early Espresso
Acceories: White baker's twine
Technique: torn edge

Well, that's it for now! I hope that this extra long post will make up for the fact that I'm only averaging one blog post per month. I promise I will try to do better! My mind is swimming with incredible ideas that I can't wait to try. Have a great day!

~Marla Pin It

Tuesday, June 7, 2011

New In Colors!

Hello again! I really like today's card. It uses three of the brand new 2011-2013 in colors: Wisteria Wonder, Island Indigo, and Pool Party. All five of the colors are gorgeous, but I really like these three together. This card also uses the Blossom Bouquet Layering punch from the summer mini catalog. It is not a standard sized card (at least not for me). It is a 5 1/2 x 5 1/2 card which is quite a bit larger than my usual 4 1/4 x 5 1/2, but I decided to try something different just for fun. Here it is- enjoy!


Supplies Used:
Stamps: Happy Greetings (summer mini)
Paper: Wisteria Wonder, Island Indigo, Pool Party, Whisper White
Ink: Wisteria Wonder
Accessories: Blossom Bouquet layering punch (summer mini), Big Shot, Lots of Tags sizzlit, Wide Oval punch, basic rhinestones, white taffeta ribbon (dyed using my Wisteria Wonder ink pad) Pin It

Friday, June 3, 2011

Card Class Preview

Hello! My apologies for not posting in a while! We had a little "incident" with our camera. My son knocked it off the top of our curio cabinet and broke it and we had to buy a new one, so I had a couple of weeks where I couldn't take any pictures. Let's face it- blog posts with no pictures just aren't much fun! I hope that you are enjoying the summer weather! We have had HOT weather here lately, but it has cooled off and been absolutely beautiful the last few days, so no complaints from me! To try to make up for not posting regularly, I have a HUGE post for you today. These are the cards that we will be making at my masculine-themed card class tomorrow afternoon. I always find masculine cards to be a challenge, but I am really happy with how this group of cards turned out! Enjoy!


Supplies Used:
Stamps: Sail Away (summer mini), Thoughts & Prayers
Papers: Crumb Cake, Cherry Cobbler, Night of Navy, Whisper White
Ink: Night of Navy
Accessories: Cherry Cobbler Baker's Twine (summer mini), Wide Oval punch
Techniques: Torn Edge
CASE of: this card

Supplies Used:
Stamps: Totally Tool, Woodgrain (background)
Paper: Cajun Craze, Chocolate Chip, Cake, Whisper White
Ink: Stazon, Cajun Craze, Basic Gray
Accessories: Blender Pens, Mat Pack, Paper Piercer, Silver Brads
Technique: Watercoloring with Blender Pens


Supplies Used:
Stamps: Lovely as a Tree, Something to Celebrate (Occasions mini), Itty Bitty Backgrounds (retired)
Paper: Crumb Cake, Early Espresso, Pear Pizzazz, Whisper White
Ink: Early Espresso, Early Espresso marker, Pear Pizzazz marker
Accessories: Big Shot, Square Lattice embossing folder, Tasteful Trim die, 2 1/2" circle punch
Techniques: marker to stamp, dry embossing
CASE of: this card


Supplies Used:
Stamps: Bring on the Cake (Occasions mini)
Paper: Marina Mist, Whisper White, Pacific Point, Cherry Cobbler, Pumpkin Pie, So Saffron, Wild Wasabi, Daffodil Delight
Ink: Staz On
Accessories: Big Shot, Perfect Polka Dots embossing folder, Blossom Petals punch (for the flames), Decorative Label punch, Marina Mist 1/8" taffetta ribbon
Techniques: sponging, dry embossing
CASE of: this card

I hope you liked these cards! I'm so excited today because I have a shipment of all new SU! supplies coming today. It has all of the brand new in colors (they are gorgeous!) as well as a copy of the new catalog! I can't wait to see it! I've heard it is the best yet! Be on the lookout for posts containing all my new goodies! Have a great day (I know I will)!

~Marla Pin It

Sunday, May 8, 2011

Happy Mother's Day


Happy Mother's Day! I wanted to write a quick post today to show you the card I made for my mom. (I hope she doesn't read this before she sees the actual card!) I saw a card very similar to this on splitcoast and wanted to make my own. The original was made by Cindy Major. I think it was the color combination that drew me to this card. I did change it up a little bit by using Concord Crush in place of the usual Perfect Plum, but it's still the same idea. I promise that I will post some cards that use a different color combination soon.


I hope everyone has a wonderful day! If you are a mom, I hope that your kids will be extra sweet and appreciative of you today. If you have a mom, I hope that you will get the chance to tell her how much she is loved!


Take care!


~Marla


Supplies Used:


Stamps: Something to Celebrate (retired hostess), Love and Care (level 2 hostess- Summer Mini)


Paper: In Color DSP (level 1 hostess), Pear Pizzazz, Concord Crush, Baja Breeze, Whisper White


Ink: Concord Crush, Baja Breeze, Pear Pizzazz


Accessories: Mat Pack, Paper Piercer, Scallop Trim Border punch, Big Shot, Beautiful Wings embosslit, Basic Rhinestones, Baja Breeze seam binding, shimmer spray


Techniques: Marker to Stamp

Pin It

Monday, May 2, 2011

Teacher Appreciation Week

Hello! Were you beginning to wonder if I would ever post again? April was an exceptionally busy and crazy month at our house and blogging, stamping, and a whole lot of other things had to get pushed to the back burner. I don't like it, but it's life. We are all back to normal now, so I hope to be posting a little more often.

Did you know that it is Teacher Appreciation Week? I am a former teacher and I just don't think it is possible to thank teachers enough for all that they do for our kids. I made a couple of little handmade gifts to kick off the week and thought I would share them with you. The picture above is a set of ten thank you cards that I made for my son's Kindergarten teacher and aid. I used five different color combinations (two cards of each combo) and the one shown is one of my all time favorites- Perfect Plum, Baja Breeze, and Pear Pizzazz. If you look back through my blog posts, you will find this combo used more than once! I used the marker to stamp technique to get the different colors on the stamped image. Don't you just love Stampin' Up's markers? They are so versatile!

Supplies Used:
Stamps: So Many Thanks
Ink: Perfect Plum, Baja Breeze, Pear Pizzazz markers
Paper: Perfect Plum, Baja Breeze, Pear Pizzazz, Whisper White
Accessories: Cello Bags, Big Shot, Top Note die, Perfect Polka Dots embossing folder, 1 3/4" circle punch, 2 3/8" scalloped circle punch, 2 1/2" circle punch
Techniques: Marker to Stamp


This is the gift that I made for my son's specialist teachers. I know that they sometimes get forgotten so I always try to do a little something for them as well. I made this bag topper using the Petal Cone die in my Big Shot. The white circle layer was punched using the 2 1/2" circle punch. The sentiment is from "Thank You Kindly" set. I filled the bag with M&M's and put a little poem that I found on splitcoast on a slip of paper inside the bag. Here is the poem:

Green is for the inspiration you give each day.
Blue is for your patience in showing the way.
Orange is for your warmth and caring style.
Yellow is for the way you always smile.
Red is for the lives you have touched this year.
You're a very special teacher, that is clear.
You place knowledge into our children's hands
And melt into their heas and lives forever.


Supplies Used:
Stamp: Thank You Kindly
Ink: Basic Black
Paper: Real Red, Whisper White
Accessories: Cello Bags, Big Shot, Petal Cone die, 2 1/2" circle punch


Have a great evening! I'm so glad that spring weather has finally arrived! Hope you're enjoying it too!

~Marla Pin It

Wednesday, March 30, 2011

Sneak Peek!


Hello! I have a little sneak peek to share with you today! This is a card that I CASE'd directly from Ronda Wade's blog. I love her style- she makes uncomplicated, but very pretty cards. Anyway, this stamp set is called "Four Frames" and it is from the 2011-2012 Idea Book and Catalog (coming in July), along with this beautiful Designer Series Paper, which is called, "Paisley Petals". Demonstrators were able to preorder this set and DSP in March (just one of the things I love about being a demonstrator- we get to see and buy things before anyone else!) and customers have the opportunity to purchase the stamp set and paper in April. April hostesses can earn both for FREE!


Here are the details of the promotion...


In the month of April, customers who place a $20 (before tax and shipping) order will be eligible to purchase the "Four Frames" set for $20.95 (wood-mount) or $15.95 (clear-mount) and the "Paisley Petals" DSP for $9.95.


Hostesses will earn both the stamp set and the DSP for FREE when they have a $350 workshop!


This promotion is for April only. This set and DSP will not be available again until the new Idea and Book and Catalog is released on July 1st. You don't want to miss out!


I have the last weekend in April open for a workshop. If you would like to be a hostess and earn these free goodies, give me a call. I'd love to do a workshop for you and your friends!


Have a great day!


~Marla


Supplies Used:

Stamps: Four Frames, Silhouette Sentiments (level 1 hostess set)

Paper: Crumb Cake, Bravo Burgundy, Marina Mist, Whisper White

Ink: Bravo Burgundy, Marina Mist

Accessories: Big Shot, Beautiful Wings embosslit, 3/4" circle punch
Pin It

Monday, March 21, 2011

Technique Club Cards #2

Good Monday afternoon! I hope you had a great weekend! My technique hostess club met for the second time on Friday night and we had a wonderful time. I have been blessed with a really fun group of ladies in my club! We even had two new ladies join our group this time. It really was so much fun! At this meeting, we focused on techniques using heat embossing. The card above uses heat embossing only and the card below we used a technique called emboss resist. I was really happy with how these cards turned out. I hope my club members liked them too!

This card was a CASE of a card made by Michelle Hamilton that I found on splitcoast.

Supplies Used:
Stamps: Because I Care (level one hostess)
Ink: Versamark
Paper: Basic Black, Rich Razzleberry, Whisper White
Accessories: Big Shot, Vintage Wallpaper EF, Heat Tool, Black Embossing Powder, Basic Black Satin Ribbon

This was the second card we made. It is a redo of a card I posted back in November. I really loved that card and thought it would be pretty redone using bright, springy colors. This card was used to teach the emboss resist technique. The larger flowers were embossed using clear embossing powder and then we sponged Sahara Sand ink over the embossed image giving it the soft shadow around the edges. This is called emboss resist because once you emboss an image, it resists ink so it doen'st stick to the image. There is also a new set that will appear in the new Idea book and Catalog that will be released in July. It is called Four Frames. I used it on the sentiment image. I love that this set coordinates with one of my favorite punches- the Decorative Label punch. Customers will have an opportunity to purchase and hostesses will be able to earn it for free during the month of April only! Contact me for more information!
Supplies Used:
Stamps: Vintage Vogue, Four Frames
Paper: Rose Red, Sahara Sand, Whisper White
Ink: Sahara Sand, Rose Red, Pear Pizzazz, Versamark
Accessories: Big Shot, Perfect Polka Dots EF, Decoratvie Label punch, Heat Tool, Clear Embossing power, Basic pearls, sponge dauber
Techniques: Dry Embossing, Heat Embossing, Emboss Resist
Have a great day! Thanks for stopping by and be sure to stop back by soon!
~Marla
Pin It

Sunday, March 6, 2011

Concord Crush Sympathy Card


Happy Sunday! We are having a rainy Sunday here and I've always thought that Sundays should be sunny, but oh well! Sunday is also the day of rest and that's all I feel like doing on a rainy day, so I guess an occasional rainy Sunday isn't too bad.


This is another card that I made using the new Build a Blossom stamp set and Blossom Petals punch. I used Concord Crush ink to make the flower. To make the two-toned flower, I inked up the solid flower petal stamp in the ink, then stamped once on scrap paper (a technique called stamping off) and then stamping again on my Whisper White cardstock. I then used the petal accent stamp full strength (without stamping off) over the full petal. I then punched them out and layered them over a circle that I punched out using the 1 3/4" circle punch.


This is a sympathy card because I had a friend request a set of sympathy cards, but it could easily be made into any type of card using the Teeny Tiny Wishes stamp set in the Word Window punch.


We will definitely be using this stamp set and punch at my upcoming flower-themed classes on April 9th and 15th. If you have not already registered and are interested in attending, I have several openings for the April 15th class, but the April 9th class is full. Please RSVP and send me your $20 ($15 for members of my stamping club) class fee by March 18th.


Enjoy the rest of your weekend! Stop back by sometime soon!


~Marla


Supplies Used:
Stamps: Build a Blossom, Teeny Tiny Wishes
Ink: Concord CrushPaper: Concord Crush, Basic Black, Pear Pizzazz, Daffodil Delight, Whisper White
Accessories: Blossom Petals punch, Word Window punch, Modern Label punch, 1 3/4" circle punch, 1/2" circle punch
Techniques: Two-step Stamping, Stamping Off

Pin It
Related Posts Plugin for WordPress, Blogger...